Interested in Trying Apple’s HomeView? Make Sure You Buy the Right Model


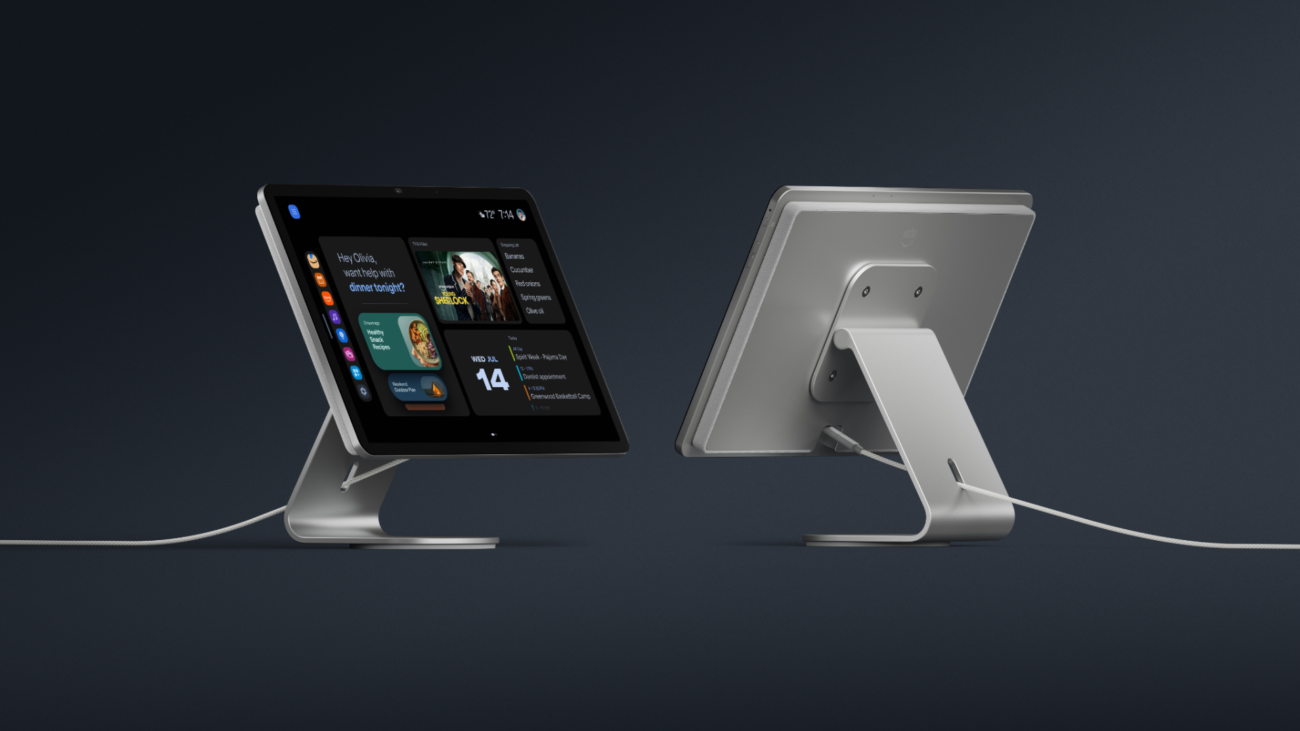
As a smart home aficionado with way too many devices to manage, Apple’s new HomeView is one of the more promising products I’ve come across. But if you’re planning to use it as your main smart home hub, make sure you buy the right model.
Apple offers two versions of HomeView: a $299 tabletop model with a speaker base and automatic tilting, and a $299 wall-mounted model. The wall-mounted model requires you to choose from several mount options, some of which Apple recommends a licensed electrician install, and you also lose the additional speaker power. This may leave you wondering which mount to buy and how much it’ll cost to hire an electrician for a wired install.
Here’s what you need to know before preordering HomeView ahead of its Nov. 13 release.
What do both the tabletop and wall-mounted models include?
Both models include the 7-inch Liquid Retina display and the capability to serve as the central smart screen for entertainment, smart home management, home security monitoring and more. Both models will support face recognition for personalized user accounts, Messages, FaceTime, Calendar, Reminders and Find My. Both will also support Siri AI and other key functionality.

One thing to note: Like other smart displays, the HomeView tabletop model isn’t detachable, a common misconception I’ve seen in launch coverage. It’s a mixed smart screen that’s attached directly to the speaker base. That means you can buy the tabletop model for $299 and get extra speaker power plus tilting and adjustment, or you can pay the same $299 for the wall-mounted model, but you lose the speakers built into the screen. There’s no price difference between the two models, and you can’t buy the wall-mounted model and then decide to purchase a base later, or vice versa. Once you buy one, you’re locked into your choice.
Who should buy the tabletop HomeView?

The HomeView model has the lowest barrier to setup and installation and comes with a speaker base that delivers stronger, room-filling audio with down-firing woofers, two passive radiators and two full-range drivers. If robust audio is a priority, I can confirm the tabletop HomeView is impressively loud, with deep, booming sound even in a spacious demo area.
The tabletop model is also the better option for renters because it requires only a standard power adapter and a USB-C cable to plug into a nearby outlet, so you can set it up wherever you want without a permanent installation.
Who should get the wall-mount HomeView and what are the options?
 Apple
Things get a little more complicated if you want a wall-mounted HomeView. You lose the speaker base, leaving only the speakers on the device itself. This makes the wall-mounted HomeView a better option if you plan on using it as your smart home dashboard, smart calendar and home security hub. You can set up a variety of widgets that provide quick access and controls for compatible smart home devices.
For the wall mount, you have three options directly from Apple, all from Schneider Home.
Power Mount USB-C Wall Connector: This is the self-install option for $59.95. You get the mount and an attached USB-C cable, but you’ll need a separate 20-watt power adapter. If you don’t already have one, you’ll need to factor that figure in, too. The upside is that it is the easiest and cheapest way to mount the HomeView, but it’ll be more unsightly, leaving a USB-C cable visibly dangling down your wall to the outlet. This could work for renters comfortable drilling a few small holes for screws and anchors, or for homeowners who want to DIY.
Power Mount AC Wired: This is Schneider Home’s hardwired AC mount, with power running through your wall. This costs $79.95, but Apple recommends installation by a licensed electrician. The hardwired connection delivers 30 watts of continuous power through a single-gang wall box, and it should sit flush against your wall. ADT service is available, but an Apple representative didn’t immediately respond to a request for details. This may be a good option if you plan to use it as a smart home hub. This is a better fit for homeowners than renters.
“For most homeowners, I’d go with the AC Wired mount,” says Michael Malfettone, owner of Malfettone Electric and licensed master electrician. “It connects to your existing home power, fits a standard single-gang box and sits flush with no visible cord. The USB-C wall connector is the easiest option if you don’t mind a visible cable or the wall already has an outlet, but it won’t look as clean. The PoE mount only makes sense if your home already has Ethernet wiring, or you’re running it during a remodel.”
Power Mount PoE Wired: This mount uses hardwired power over Ethernet, giving you both power and a continuous, direct internet connection. A single Ethernet run carries both power and a wired network connection and doesn’t rely on Wi-Fi. It’ll work with a power-over-Ethernet network switch and an Ethernet run to the mount. This will cost you the most, at $129.95, and ADT installation service is available, though we’re still waiting on additional details from Apple on if this is a partnership or if you can simply book through ADT directly without Apple being involved. Because it provides continuous power and internet without relying on Wi-Fi, it’s the best option for home security, smart home and climate control.
“It’s for people who want a wired, always-online connection that doesn’t depend on Wi-Fi,” says Malfettone. “That’s usually someone with a lot of smart home gear, a structured wiring panel or a network closet. Controlling central heat and air from a dashboard works fine on either mount, so PoE is really about the network, not the thermostat. PoE is low-voltage work with no AC wiring at the wall.”
How much will a licensed electrician’s installation cost?
 Apple
For an AC-wired install, expect prices to vary based on factors in your home. “If there’s already a box or outlet with power right where you want it, expect about $150 to $300,” says Malfettone, whose business is based in Jersey City. “If we have to fish a new line through a finished wall from a nearby circuit, figure about $400 to $600. A dedicated new circuit from the panel or tough access, like plaster walls, multiple floors or no attic or basement access, can run $600 to $1,000 or more, plus permit fees and any drywall repair.”
Malfettone cautions that the AC-wired installation may require permits, depending on your state. “It’s line-voltage work. You need a single-gang box at the mounting spot with a 120V feed, either tapped from a nearby circuit or run new. Then we would connect the mount and patch the wall if needed. In New Jersey, adding a new box or circuit generally needs an electrical permit.”
For a PoE-mount installation, Malfettone says, “The cost is mostly the Ethernet run back to your network gear, roughly $150 to $400 per run. If you don’t already have a PoE switch, add about $100 to $250. It’s easiest in new construction or when the walls are already open.”
He doesn’t rule out installing it for condo owners, though he notes single-family homes are easiest because the owner controls the walls and panel. A condo owner will likely need to check with the HOA first and confirm building requirements for licensed work. Though Malfettone notes both types of homeowners can benefit from a smart home control interface to control lighting, security, climate control and connected devices.
“We always advise our clients that a permanent smart-home display should be planned as part of the home’s electrical and networking infrastructure,” says Malfettone. “The best installation isn’t necessarily the most expensive one — it’s the one that provides reliable power, a clean appearance and flexibility for future technology and expansion.”

See full bio